

“Life is what happens to you while you're busy making other plans”
John Lennon
 |
| Beautiful Etsy Turquoise Platter |
What a perfect quote for me right now. I haven't been blogging as much lately because I have been incredibly busy. For those of you who don't know me personally I work full time as an event coordinator for a student ministry at a local church. Seems simple enough right? Until you take into consideration that our church student ministry is so large that we have to put on our own camps during the summer. Due to this I am pretty much in non-stop work mode from mid-May through the middle of July. Unfortunately this means I come home from work and either finish more work, like I'll be doing tonight after I finish this post, or I'm so mentally drained I don't get around to sharing my thoughts and recipes on here. However, I do still cook during this time. For me cooking is almost a calming ritual of sorts. I drive home, feed and walk the dogs, and then immediately start working on dinner while watching some of my favorite TV shows (yes I'm lucky enough to be able to see my TV from my kitchen). However, tonight I am catching up with one of my girlfriends at my favorite local coffee shop. She's the overachiever who is sitting here studying for grad school while I type a quick blog before I start working on camp expectation manuals (sounds fun huh?). So needless to say I'm not cooking tonight, instead I'm writing about something that I really feel makes a difference in your cooking... cutting your meat. I know seems simple enough but so many of us get it wrong all the time and ruin what would have been a tender, juicy cut of meat.
 |
| cut too early = dry chicken |
Some of you may already know the first rule I'm going to tell you, but it is alwasy worth repeating... don't cut your meat immediately! Ever wondered why so much juice fills up your cutting board when you cut your meat (example the picture to the right)? The answer is because you're cutting it to early. The meat needs time to sit and rest and allow the juices to redistribute to give you a juicy cut of meat. Most meats should sit anywhere from 5-10 minutes before being cut. This also means don't cut your meat to see if it is done yet (note to my husband yes this applies to you as I know you love to do this)! Instead use a meat thermometer. It doesn't have to be an expensive one just buy a cheap one from Walmart or Target and they'll do the trick. Use the meat thermometer and you'll have juicier meat... that alone is worth the $5 for the thermometer.
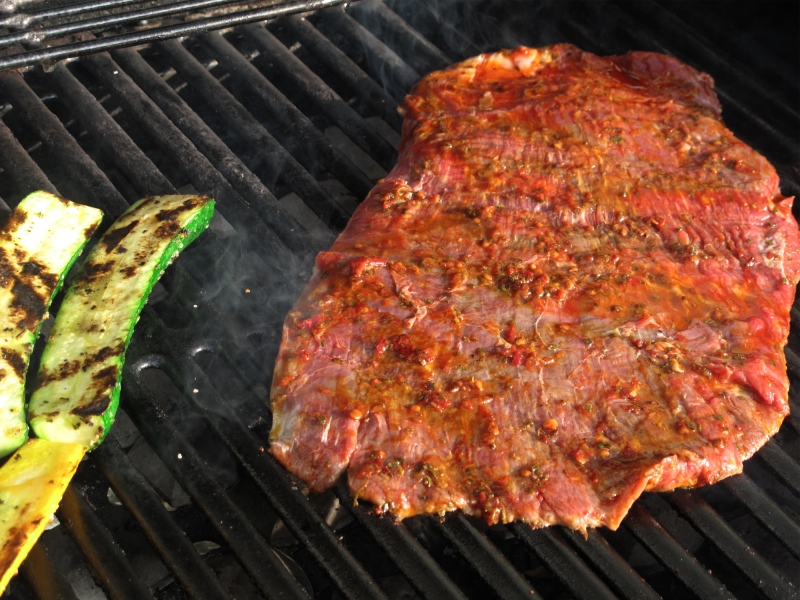
Rule number two doesn't apply to all meats but is definitely a golden rule. Some meats should be cut against the grain. Now the jury is still out on specifically which meats but a good rule of thumb is with tough cuts of meat always cut against the grain. How do you know which cuts are tough? Think of how the animals work. The areas they use more will be tougher (think harder muscles) while the areas they use less will be more tender. For beef basically any meat from the leg or neck will be tough. A way to remember this is the "hoof and horn" rule. The farther away from the hoof or horn the meat is the more tender it will be, the closer to the hoof and horn the more tough it will be. To understand better where some of your favorite cuts come from refer to the picture below. One nice thing about tough meat is it is usually cheaper. For example, I love to make a flank steak for serving on top of salads. It's great to use because it is a tougher meat so it's cheaper and it grills up relatively fast. However, cut a flank steak with the grain and you will have a steak that resembles beef jerky but cut it against the grain and your steak will practically melt in your mouth.

You might be wondering what I really mean by against the grain and with the grain. Some of you may never have even realized their was a grain. Don't worry the first time my mom told me I had to look it up online :). Below are some pictures that explain it better than I can in words.
Step 1: Find the grain
 |
| An example of finding the grain on raw meat you can see that it is vertical in this picture |
 |
| An example of finding the grain on cooked meat, although it is harder to see it is also vertical in this picture |
Step 2: Hold your knife against the meat at a 45 degree angle and slice
 |
| hold at a 45 degree angle and slice (before or after cooking) |
Step 3: What your meat should look like
 |
| The left side is properly sliced against the grain, the right side is improper slicing with the grain |
Now for some of you, you might not even know where to start as far as what meats to purchase. Below is a list that I found very helpful and had to include. The following are American Cuts, however, you can also purchase Dutch or UK cuts. I would suggest looking these up only if you're going to a specialty market. Most of your typical grocery stores will carry the American cuts.
Meat Cuts From Wikipedia:
The chuck is the source of bone-in chuck steaks and roasts (arm or blade), and boneless clod steaks and roasts, most commonly. The trimmings and some whole boneless chucks are ground for hamburgers.
The rib contains part of the short ribs, rib eye steaks, prime rib, and standing rib roasts.
The brisket is used for barbecue, corned beef and pastrami.
The foreshank or shank is used primarily for stews and soups; it is not usually served any other way due to it being the toughest of the cuts.
The plate is the other source of short ribs, used for pot roasting, and the outside skirt steak, which is used for fajitas. The remainder is usually ground, as it is typically a cheap, tough, and fatty meat.
The loin has two subprimals, or three if boneless:the short loin, from which club, T-bone, and Porterhouse steaks are cut if bone-in, or strip steak (New York strip) and filet mignon if boneless, the sirloin, which is less tender than short loin, but more flavorful, can be further divided into top sirloin and bottom sirloin (including tri-tip), and the tenderloin, which is the most tender. It can be removed as a separate subprimal, and cut into fillets, tournedos or tenderloin steaks or roasts (such as for beef Wellington), or can be left on wedge or flat-bone sirloin and T-bone and Porterhouse loin steaks.
The round contains lean, moderately tough, lower fat (less marbling) cuts, which require moist cooking or lesser degrees of doneness. Some representative cuts are round steak, eye of round, top round and bottom round steaks and roasts.
The flank is used mostly for grinding, except for the long and flat flank steak, best known for use in London broil, and the inside skirt steak, also used for fajitas. Flank steaks were once one of the most affordable steaks, because they are substantially tougher than the more desirable loin and rib steaks. Many recipes for flank steak use marinades or moist cooking methods, such as braising, to improve the tenderness and flavor. This, in turn, increased the steaks' popularity; when combined with natural leanness, increased prices have resulted.
May you have many tender, juicy meat dishes in the future!!!

Don't forget you can get posts via email rather than having to check back every day...

Excellent post. Informative and interesting which we share with you so i think so it is very useful and knowledgeable. I would like to thank you for the efforts. I am tiring the same best work from me in the future as well.
ReplyDelete